

Recently, I started noticing other blogs’ headers.
I mean, doesn’t everyone?
A few days later, I was poking around on Etsy and realized people actually sell blog header packages. Like, this is a whole thing. A market! For headers! Who knew?
The prices were around $30 for a “package,” but I didn’t inquire what exactly a package included.
Tee hee.
(For those less in-the-know, “package” is also another word for penis.)
Then, a few days later, I saw a blog post by my friend Jeanette, who had created a really cool header using only PicMonkey. And I was like—wait, WHAT. You can do that?!
Side note: for those who aren’t bloggers, hang in there—it gets more interesting. Or… not. But I promise to stop talking shop and resume bathroom jokes shortly. HANG TIGHT.
Until then, here’s your handy Blogger-to-English dictionary:
PicMonkey – a free-ish photo editing site
Blogger – a free blogging platform
WordPress – a more advanced-ish, somewhat free-ish blogging platform
Header – the stuff at the top of a blog where the title sits
And just for review:
Package = penis
So Jeanette’s header was quite lovely, and I decided that I didn’t want to pay $30 either—so maybe, probably, possibly I could do that too?
But I filed it away on the back burner of my brain because that’s how my brain works. So, for a few more months, I stuck with my Blogger header.
What I really needed was motivation—and that motivation showed up as a birthday gift. My brother and sister-in-law surprised me with the cutest cartoon caricature of myself.
I had never even considered something like this before!
Meet “Kari”…

What a good hair day I was having!
And I look a lot like Ellen DeGeneres, which… I’m still not sure how I feel about.
My sister-in-law used the headshot from Listen to Your Mother for the caricature.
I love that she chose this photo, because it will always remind me of my very first professional headshot.
For first-time visitors, here’s how things work around here: I ramble.
If you’re looking for a more polished, professional tutorial-type blog, I totally get that. You might not be thrilled here. No hard feelings!
Are they gone?
GOOD.
BRING OUT THE BEER BONG AND THE TOGAS!
If you’re still here, you’re my kind of people.
How to Create a Header on Your Blogger Blog
(I don’t “do” WordPress because I don’t “understand” WordPress—don’t @ me.)
Step 1:
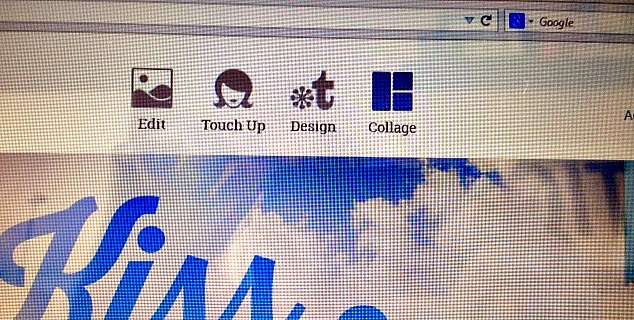
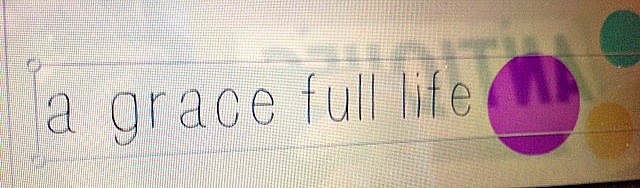
Go to PicMonkey and click the “Design” button at the top of the page. This will open a blank canvas—aka your future fabulous blog header.
I don’t know how to take a screenshot on my computer. I hope this won’t be a problem for you.
Step 2:
Once you click “Design,” you’ll see a menu pop up on the sidebar (ooh, fancy). This is where you can pick your canvas size.

Step 3:
One of the sidebar options is Canvas Color. You can pick literally any color your heart desires—but I’d recommend sticking with either white or transparent.
I originally chose white because I’m wild like that, but when I uploaded it to my blog, there was this noticeable gap at the top. Honestly, it didn’t look that bad… but I have perfectionist tendencies (diagnosed by me), and it bugged the crap out of me.
So I went back, checked the Transparent Canvas box instead—and poof! No weird lines, no awkward gaps. Just clean and seamless header glory.
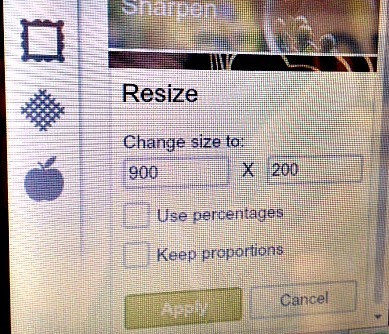
Step 4 — Size matters!
I found this magical Pinterest tutorial that told me Blogger headers are usually 900 x 200 pixels. Fancy, right? Honestly, you should probably just read her blog — she explains it way better than I ever could. In fact, just go there now and don’t come back until you have your header done.
But… DO come back after. Because, well, I’m a hoot and you need this party to keep going.
So now you’ve resized your canvas to fit the top of your blog and picked your canvas color.
Congratulations!
You’re officially ready to design your header, where the real fun begins (or where your perfectionism might go into full freak-out mode).
Wait… what step are we on again? Who cares! Let’s just keep rolling.
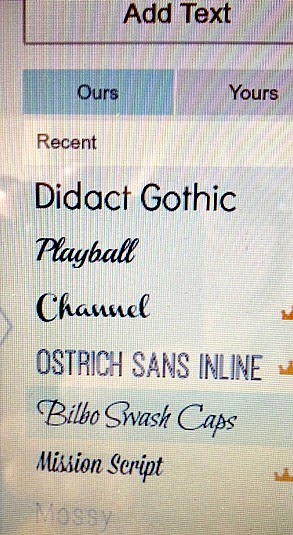
At this point, I zeroed in on what I wanted my title font to look like. Because fonts are everything, right?
Pic Monkey has a bunch of fonts that make me swoon. Channel and Mission Script are like my secret crushes.
But for the current title, I went with Ostrich Sans Inline — because why not name your font after a flightless bird?
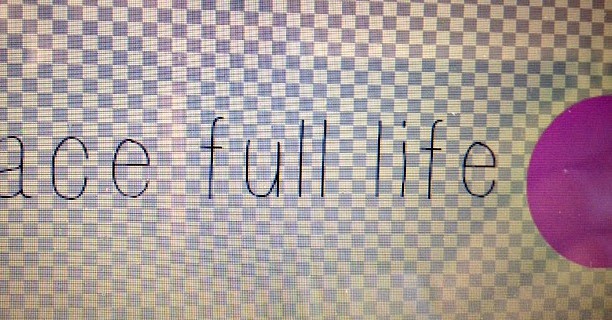
Which IS NOT the font above. Because if this were a real tutorial, I’d have screenshots of the actual font I used. But nope, that would require planning and adulting.
Oh, and heads up — when you check the box that says TRANSPARENT, the background turns into those little gray-and-white checkerboard squares you see above.
If you’re doing this without a tutorial, prepare to freak out like me. You’ll start quivering and asking yourself:
-
WILL THERE ACTUALLY BE SQUARES IN THE BACKGROUND?
-
IS PIC MONKEY SECRETLY MESSING WITH MY BRAIN?
-
AM I THE ONLY ONE WHO CAN SEE THESE SQUARES?
-
HOW MANY MULTIVITAMINS DID I TAKE TODAY?
-
WAIT… AM I HIGH?!
Those squares? They’re there to prove to you that yes, it is transparent.
But let’s be real — those squares are also there to mess with your head.
Once you pick your font and get the size just right, you might wanna jazz it up a bit.
Like adding mustaches. Or bowler hats. Or heck, cartoon versions of yourself.
With enormous balls.
I happen to really like enormous balls.
So naturally, I thought, why not have enormous balls all over my blog header?
Some folks call them circles.
Others prefer the fancy term orbs.
But me? I’m all about the balls.
If my mom had her way, she’d say circles — bless her.
But, she’s not the one writing this blog. So balls it is.

Step Ten? Ten sounds right.
Click on Overlays on the left — it’s the one with the pretty butterfly.

After clicking on the butterfly, click on Geometric to dive straight into the world of balls.
The default color is black, but don’t let that limit you — you can make your balls any color of the rainbow.
Red balls? Sure. Green balls? Why not. Big blue balls? Chef’s kiss — those are my personal fave.
From here, the options explode like a party. Play with your balls, triangles, rectangles, stars — but seriously, play with your balls.
Full disclosure: I was having so much fun juggling my balls, I totally forgot to tell you how I got my cartoon self in there.
I simply saved the cartoon file to my computer and added it as a photo on the canvas. Voilà — instant blog mascot!
I had so much fun that I ended up making four headers.
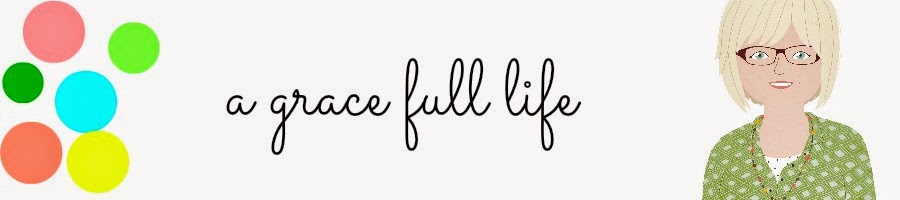
This one had balls to the left.

The balls-less version.

Balls to the right! I shrunk the big blue ball and made the pink ball go full diva on the canvas.
Turns out, I don’t love big blue balls as much as I thought I would. Huh.
Who knew a simple header tutorial would turn into a full-on self-discovery session?
This is exactly why I love blogging — learning about myself one ball at a time.
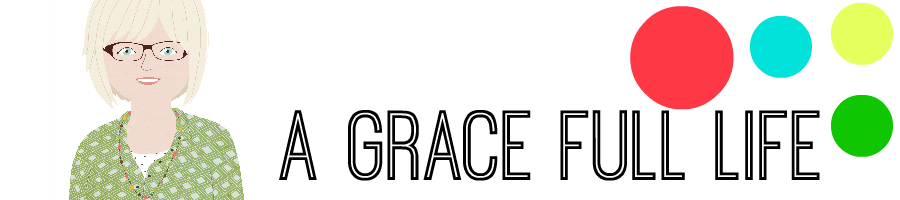
The third and fourth headers look almost identical, but clearly, I went a little nuts with the balls.
If you’re not laughing right now… well, you might not have a soul.
I hope I helped you realize that yes, you can change your blog header without being a web designer.
Or maybe I helped you decide never to follow a tutorial on this blog again.
Yeah, probably the second one.
Discover more from A Grace Full Life
Subscribe to get the latest posts sent to your email.

Oh my gosh! Now I have no excuse for not having a relatively cool header (meaning it will not be as cool as yours)…Change scares me sometimes and I am indecisive, so I am hoping I can talk my 14 year old into believing this is the most fun she could possibly have this summer. I mean, she totally have my best interests at heart, right?
LikeLike
You can do this!!!Change scares me to death. Tell your 14 year old to create your header for you.Now THAT is some fun.
LikeLike
Your header is awesome, but that is not why I love this post. I love this post because it made me laugh. Loudly.Balls.
LikeLike
BALLS.
LikeLike
YEAH BLOGGER BLOGS RULE!Or something like that.I don't "get" WordPress either. Not that I've tried to.Your tutorials sound like my recipes.Which means we must be friends.Is it weird that after reading your blog that I tend to think in short sentences?Watch out, blogger – Imma make mahself a new header. Thanks for the most awesome tutorial, Kari!
LikeLike
Short sentences rule, so we are soul mates. I can't wait to see your new header!
LikeLike
BALLS. Also, I don't want a raging case of herpes. That doesn't sound fun. Great tutorial!
LikeLike
No herpes for you my friend.Thank you. :)
LikeLike
OMG, I am dying over this…you crack me up!! And I LOVE them and I may even try this myself.
LikeLike
Ooh if you do, I want to see it!!
LikeLike
Dang. You just might motivate me to update mine. I love picmonkey and use it all the time… but often don't use the creations on my actual blog. Guess I better get off my rear. your picture is awesome and amazing job on the header!
LikeLike
Thanks friend!
LikeLike
You are too funny Kari girl. Just to make sure, you checked to see if you could use the illustration for anything you want, right? The last thing you want is small print in the artist release… I also got a hair up my butt about blog design over the weekend and made some updates. =)
LikeLike
Fuuuuuudge.I didn't even think of that…….sonofa…….
LikeLike
Asked my sister in law, its all good!!
LikeLike
I'm on WP, but I may try this. And I'm making it my mission in life to teach you how to take a screenshot, so you don't have to actually take photos of your screen. Which is totally adorable.
LikeLike
PLEASE.HELP ME.
LikeLike
Like I said, I LOVE IT! I used PicMonkey for my header, too. But that was a bazillion years ago. Maybe I need a new do, too. I'd read your tutorial any day. You always make me LOL!
LikeLike
Aww thanks Sandra!Can't wait to see you next week!
LikeLike
Thanks for the tips! It is so thoughtful of you to let us all use your caricature and everything! Wait, did you mean for us to use our own pics?
LikeLike
You can TOTALLY use my picture.
LikeLike
All the time I have been on PicMonkey and I have never even remotely checked out what Design does? Now I feel pretty stupid. I love the new header and I love the cartoon you. Wonder if the cartoon people could do me, but only thirty pounds lighter and with my roots colored in?
LikeLike
I want to be a supermodel in my next cartoon.Maybe I will send in a picture of Gisele Bundchen.Or someone I like.
LikeLike
Ha ha ha…balls. I like #1 cuz there's lots of balls and #4 cuz there's big balls. Now who sounds 10 years old?! Anyway, your header is awesome. I've always made mine in PicMonkey but I like how you used images instead of photographs. Guess what I'm going to be fooling around with tonight, thanks to you? No, not balls…with my blogger header. (I move furniture and stuff all the time, too…but I think you have me beat with re-doing the same room 3 times in one year!)
LikeLike
In fairness to myself, I haven't moved it around since last year.That is a record for me!Have fun!!
LikeLike
This is awesome! So good to know. Thanks for sharing!
LikeLike
Thank you Corrine!
LikeLike
Thanks for the great tutorial and for making me laugh! I've been wanting to change my header but was afraid I'd screw it up (my mother would have said "mess it up.") My blog is also too narrow. Any tips for fixing that?
LikeLike
Are you on Blogger? If so, go to Template, then Customize.Click on Adjust Widths to the left and that is where you can widen your blog.If it can't be widened any more, I am not sure what to tell you.Good luck!
LikeLike
I love your header!!! And I love your little face up there on it- you did an awesome job, and thanks for the link to me. I like balls to, but prefer to demurely call them dots. And then giggle behind my hand.
LikeLike
Reblogged this on A Grace Full Life.
LikeLike
Oh I love doing things like this. I’m a wannabe graphic designer so I HAVE TO try to make new headers and images and logos. Fun post that rings as true today as the day/year you wrote it.
LikeLiked by 1 person
I am in love with Pic Monkey for things like this. This was before Canva was around, which is actually more of a favorite because that is free. Sadly, Pic Monkey isn’t anymore. But it makes you feel like a graphic designer. I have come a long way since 2014. ;)
LikeLiked by 1 person
I miss Picmonkey but left when it was no longer free. That might be where I made my blog header–I honestly can’t remember and I’m not even sure I have it anymore. I did create a watermark for my photos too and thankfully didn’t use it very often now that I have switched blog names.
LikeLiked by 1 person
Watermarks! Omg those were the days….😂
LikeLike
This was also good for my endorphins :-) (yes, I’m reading out of order)
This makes me nostalgic for 2014. And old PicMonkey. Thank you for making me laugh so hard on a Monday morning. Off to work—
LikeLiked by 1 person
I’m so glad I could make you laugh this morning. ❤️
LikeLike